More about . . .

Thursday, October 14, 2010

Peaches

We have access to a wonderful program called Bountiful Baskets in our area.  Every other week I get an opportunity to purchase a BIG basket of produce for a flat $15 fee.


They also offer great prices on boxes of peaches, pears, tomatoes, apples, etc. when they are in season.  This past order cycle they had peaches, and they were beautiful.  I ordered a 22 pound box, but then of course I needed to use or can them up quick.  This is what I was able to do with my box of peaches.


Canning peaches is really quite simple, although depending on how many peaches you have it can also be a bit time consuming.


Canning Peaches

Peaches (freestone so the pits come out easily)
Water
Sugar
Sterile canning jars
Canning lids
Water Bath Canner
Fruit Fresh

1.  First prepare your peaches by dipping them in a pot of boiling water for 30 seconds.  Remove with a slotted spoon and immediately place in a sink full of ice water.  This will loosen the skins for easy peeling.

Blanched peaches
To remove the skins just use a paring knife to lift a corner of skin, and the rest should peel off easily.

Skins removed
Next, cut around the pit to create 2 halves.  Remove the pit and scrape the red fibers off the flesh of the peach.  Slice to whatever size you desire and place in a bowl filled with 1 quart water and 1 T. fruit fresh to prevent darkening.

Fill your jars.  I like to use a jar funnel to make this part easier.

OH so pretty peaches
Pour a light sugar syrup over the peaches to within 1 inch of the top of the jar.  You make the syrup by bringing 9 cups water and 2 1/2 cups sugar to a boil until sugar dissolves.

Once your jars are filled, run a knife along the inside of the jar to let any air bubbles escape.  Fit canning lids to jars and tighten.  Place in a boiling water canner and process quarts for 30 minutes.


Remove jars from canner and let cool.  Make sure your jars sealed before storing. Any unsealed jars can be stored in the refrigerator and used within 2 weeks.

Here is a great link for advice on canning all kinds of fruits.

Monday, August 30, 2010

Get Crackin' - Wheat


So you've got loads of hard wheat berries - how can you make this into a delicious and hearty hot breakfast cereal?  It's really quite simple, and it takes only one tool - a food processor or a blender (they work equally well).

Place 1/4 - 1/2 cup of wheat berries into your very dry food processor and process on high (or "liquefy" in a blender) for 30 seconds to a minute until the berries are all cracked up :)  I like to use the pulse feature to make sure all of the wheat berries encounter the spinning blades.


That's it.  The cracked berries will cook much faster than regular wheat, and will cook up in the same way that you cook rice on the stove or in the microwave. You can use cracked wheat to make hot cereal, add it into bread, or cook it up and use as a meat filler.  I even have a jell-o recipe that calls for cracked wheat.  I'll share that recipe soon.

Not that you need it, but here is a short video of wheat getting cracked.

Monday, July 19, 2010

My Very Own 100% Whole Wheat Bread Recipe

Well, what does one do with a 25 pound bag of wheat?  A family staple at our house is homemade bread.  Seldom do I buy bread from the grocery store.  This recipe has just enough sweetness to entice my kids to like it, and oodles of whole grain nutrition.


I keep the wheat I use regularly in a 5 gallon bucket.  This is my bucket of hard white wheat.  I also use hard red wheat - just depends on the mood I'm in :)


I load about 6 cups of wheat berries into my NutriMill grinder and grind it on high. The FINE - COARSER dial I set so that the arrow is below the "N" in "FINE."


And I get this wonderful whole wheat flour.  It has a much richer flavor when you grind it fresh, and is undoubtedly more nutritious, but I don't tell my kids that!!

Then I use it to make bread, rolls, cookies, pancakes - pretty much any recipe that uses flour.  Here is my 100% Whole Wheat Bread recipe.


Heidi's Hearty 100% Whole Wheat

3 1/4 cup warm water
1/4 cup sugar
2 Tbs molasses
2 Tbs honey
1 1/2  Tbs yeast
3 Tbs butter, cut up
2 tsp salt
6 cups whole wheat flour
3 Tbs dry milk powder
3 Tbs gluten
1 Tbs dough enhancer (optional, but it gives the bread great texture)


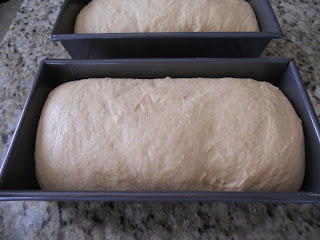
Place the warm water, sugar, honey, molasses, salt, yeast and butter in a large bowl.  Stir.  Add 2 cups of the flour, dry milk, gluten, and the dough enhancer.  Stir and let sit 5 minutes.  Stir in remaining flour to form a soft dough.  Turn out on floured surface and knead for 5 minutes.  Set in greased bowl, cover and let rise 1 - 2 hours or until double in bulk.  Punch down and form into bread or rolls.  Let rise again.   Bake at 350° for 35 minutes for bread, and 25 minutes for rolls.

Makes 2 large loaves.


Monday, July 12, 2010

What Do You Know About Wheat?


I came across this very informative website this morning published by the Wheat Foods Council.  Super informative, and what I really enjoyed was reading over some of the recipes and watching their "How Wheat Works - Harvest Videos"

I will share one of them here for your enjoyment, but be sure and check this site out!

Thursday, July 8, 2010

Dehydrated Bananas


I found bananas on sale this week for $0.33 pound.  So I purchased the above bananas for less than a dollar and decided to dehydrate them to make a great snack.


This is my trusty Magic Chef food dehydrator that I purchased about 15 years ago on sale for around $20.  It works great for drying fruit and vegetables and making fruit leather, but it is a little noisy as it runs.


First I slice up the bananas about 1/8- 1/4 inch thick.  It's important the pieces are uniform in thickness so that they dry at the same rate.


Then soak the sliced bananas in a mixture of 2 cups water with 1/2 T. Fruit Fresh dissolved in it.  This will help keep your bananas from turning too brown (although they will be brownish when done drying).


Lay the bananas out on the trays. My machine has 5 trays, which I like to spray with cooking spray to make removing the fruit when it's dry easier.


Stack the trays onto the dehydrator base and start it up.  Depending on the thickness of your fruit and how dry you want it, it will take anywhere from 8-15 hours to dehydrate them.  I prefer my bananas to have a little chew and pliability to them when they are done.  This batch took just 8 hours to dry.


Enjoy your chewy, nutritious, and delicious snack!


Thursday, June 24, 2010

Homemade Laundry Detergent - But Better!


I have recently been making my own laundry detergent for a couple of reasons. One, it saves a ton of money for our family of 6.  Two, when you are trying to store supplies, having a bunch of jugs of laundry soap is very space consuming.  The ingredients to make your own soap take up very little room.

So I was given a recipe to make the detergent, which is the one you find all over the internet.  They all basically contain the same ingredients in different ratios:  A bar of grated Fels Naptha soap, Borax, Arm & Hammer Washing Soda, and the option to add some drops of essential oils for scent.

So I made this recipe a few times, and although I felt good about the savings, and it was kind-of fun to mix up the recipe in a big 5 gallon bucket, I was feeling disappointed when I used it.  I love doing laundry.  I love the smell of the laundry soap, the fresh smell of clean clothes, and the satisfaction of taking a dirty wrinkly item of clothing and turning it into a fresh, clean and folded garment.  This homemade laundry soap was just kind of blah.  The clothes seemed clean-ish, but not deep clean.  I felt like my clothes were all getting dingy.  And the smell was good, but it didn't smell laundry-ish nor did the clean laundry smell linger on the clothes.

So I started experimenting with adding other ingredients.  I noticed that adding a scoop of oxy-clean to the washer along with my homemade detergent really helped eliminate the dingy look the clothes were picking up.  I can get a container of oxy-clean at my local Dollar Tree for, well, a dollar.  I decided to add a container to my recipe.  It was a good idea in concept, but I have never seen so much foam in all my life.  The foam billowed out of the bucket when I added water, and the detergent turned all lumpy.  In my trial and error process, that was definitely an error.  It also didn't solve my problem of making my laundry smell fresher.

Then I ran across this all OXI-Active detergent for $4.69 a bottle.  It already had oxy power in it, but the manufacturer had done all the science to prevent it from foaming up once it hit water.  It also smells fantastic and laundry-ish, so I decided to add a bottle to my recipe.  It is the perfect solution, now my laundry is coming out fresh and clean.  It did drive up the cost per load a bit, but I am still saving tons of money, and I once again feel good about my laundering results.


So, here's my recipe.

Heidi's Homemade Laundry Soap

1 1/2 cups Arm & Hammer Washing Soda (not baking soda)
1 1/2 cups Borax
1 cup Sun color safe bleach (I can find this at Dollar Tree)
1 bottle all OXI-Active detergent (28 load size)

(I can find all of the ingredients above at my local Kroger and Dollar Tree.  I have added the links in case you have difficulty finding one of the ingredients)

Grate the Fels Naptha soap and dissolve in a large pot with 12 cups of water over medium high heat.

Pour into a 5 gallon bucket and add the washing soda, borax and color safe bleach. Stir until dissolved.

Add 8 cups of hot water.  Stir and add the bottle of all OXI-Active.  Fill bucket to about 2 inches from the top with tap water.

Let sit for 24 hours.  Stir and use 1/2 cup to 1 cup per load.  I have an old laundry detergent container that I just keep refilling out of my big bucket.  I use 2-3 lids full per load.

This detergent is safe for high efficiency washers.  


Saturday, June 12, 2010

Canning Beets

I just love beets.  I love their earthy flavor and brilliant burgundy color.  Now I know not everyone shares my passion for the vivid vegetable, but they are easy to grow and full of terrific nutrients so I thought I'd share how to can them to be enjoyed year round.


First you need to harvest your beets when they are 1-2 inches in diameter.  Cut off the stems 2 inches above the beet and place them in a sink full of water to soak.

Next put the cleaned beets in a large pot, cover them with water and put them on the stove to boil.  Boil for 15-20 minutes or until the skins are loosened enough to peel easily.

Remove the beets from the heat and submerge in cold water to cool.  I just drain off the hot water and run cold water over the beets until they are cool enough to handle.  Once they have cooled remove the skins.  They peel off easily with your fingers under running water.  I like to wear gloves to prevent purple fingers!
You'll end up with a beautiful bowl of peeled beets.
Slice 'em or dice 'em however you like and put them in clean, sterile canning jars.


Add 1/2 tsp. canning salt to each jar then ladel boiling water over the top of the beets leaving 1 inch headspace (that just means keep the level of the water 1 inch below the jar rim).

I like to use a canning funnel to prevent spilling boiling water all over the place!  Now run a knife around the inside of the jar to remove any air bubbles and wipe the jar rims.


Next it's time to put lids on the jars.  Place your canning lids in simmering water for at least a minute to soften the sealing compound.  Using a magnetic lid lifter remove the lids from water and place them on the filled jars.


Screw on the jar bands.


And it's time to process them in your pressure canner.  Process beets at 10 pounds pressure, 30 minutes for pints and 35 minutes for quarts.  For more information on using a pressure canner click here.

When you're done canning let the canner come to room temperature on it's own before removing the beets.  I use a jar lifter to remove the jars because they stay quite hot.  Let the jars sit for 24 hours, then label and store in your food storage closet. 


Ahhhh - beautiful, bountiful beets!